The arm sling won't work with the Comfort Keyboard, but it works fine with either
a regular keyboard or a LittleFingers keyboard in a holder. Take a piece of heavy cloth 18 inches by 8 inches and loop it into a cylinder and sew it (along the 8-inch edges). This is your sling. But you're not done. Cut a piece of thick wire clothes hanger 13 ½ inches long and bend the last 4 inches of each end to an 80 degree angle, then bend the last 3/8 inch of each end over on itself so no sharp edges are accessible. Fasten this wire ½ inch from the bottom and side edges of the sling with 2-inch cloth tape. Sew around the edges of the tape so it won't come off. Sew a separate piece to the top where the sling will get attached to the tubing. What tubing? The 8-foot piece of soft surgical tubing you get at a medical supply outlet. Also obtain a 1-inch curtain rod ring/hook and fasten this on the top of the sling with the tubing inserted through it and use a bag tie or big document clamp to fasten the tubing against itself a foot towards the ceiling. Tie a knot on the ceiling end of the tubing after inserting it through an eye-screw. You'll have to readjust the tubing upward as it stretches. The tubing should stretch about a foot once the upper half of your forearm is in it, and your fingers should just barely touch the keys without stretching. Your middle finger should, in a comfy, at-rest, partially-bent position, just touch the H key. The secret to keeping this sling an effective stress minimizer is in balancing it in such a way that you don't have to either raise or lower your forearm, or bend your wrist, in order to type. You just move your fingers down comfortably as you move your forearm back and forth sideways so you're comfortably over the keys. I advise against bending your wrist sideways or stretching your fingers too widely—it can be stressful. Tune into the stress levels in your upper arm and wrist occasionally. You'll have a tendency to hold up your arm to compensate if the sling is too low, and hold your arm down if the sling is too high. Both situations build stress. And in order to keep wrist stress to a minimum, you'll have to be really fussy about how far your hand extends outside the sling. After many experiments, I found that a foam wrist rest inside the sling, protruding about 1 ½ inches outside of the hand end of the sling, minimizes stress best. I simply found a 9-inch by 15-inch piece of the softest possible ½-inch foam and folded it over on itself four times, then duct-taped the elbow end so that it wouldn't unfold on its own. The protrusion out the hand end of the sling gives the palm and lower thumb a kind of support platform—with the lower thumb partially on and partially to the side of this platform. In using the support, experiment with the following elements to see what feels best, and also fine-tune them occasionally when your hand or wrist complains a bit: • tube length • hand position on platform • extent of platform's protrusion outside of sling • extent to which thumb is on or to the side of platform • how many fingers you're typing with and how wide you stretch them as opposed to swinging the entire sling sideways |
Building an Arm Sling |

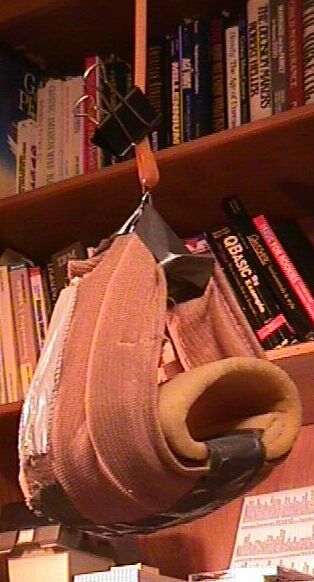
After years of using the above sling, I found that a couple of modifications helped
a lot. First, I took off the wire mentioned above and instead just taped the
foam padding inside (details later). If this turns out to be too tight side to
side, add a 4"-wide cardboard layer under the foam. Next, remove the curtain rod
ring and tape duct tape in the CENTER of the sling at the place where the ring
hooked the sling and all the way around the inside of the sling and then around
the outside too until it overlaps a bit. I used the same loop-all-the-way-around
method for the foam roll too, but I went underneath the top layer and taped
the second layer down before going all the way around and overlapping. It was
a bit tricky getting the tape not to stick inside the roll of foam. Be aware
that my arm goes on top of the top foam layer, not through the foam loop. Next,
I pinched together the top duct tape loop from side to side and used nails (first
small, then bigger) to jam a hole through the tape. Next, I got a small S-hook
and put it through the hole and pliered it shut at both ends. Then I jammed
the tubing through it and clipped the document clip on the folded over tubing.
The thing to get here is that the sling is suspended from the center now, not
the end—see photos. |


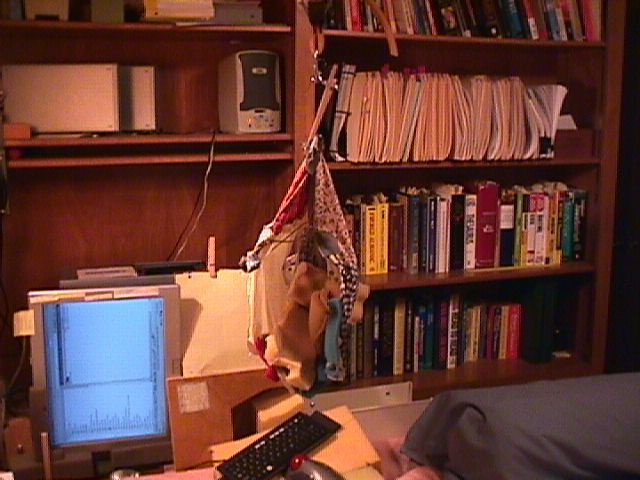
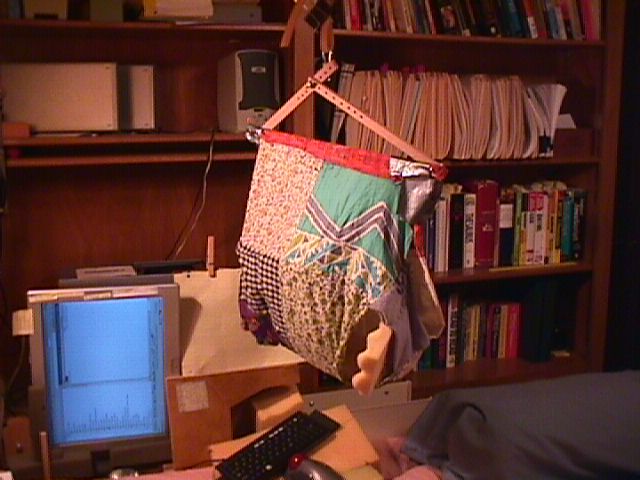
To the left is the sling described above. Since making that one, my arm and wrist
got even fussier, so I built the one you see in the big pictures below. The bottom picture shows the sling in the position in which it gets used. The foam
on the end keeps the elbow in place. The top picture shows an end view in which
you can see that the softest foam I could find is used half-inch thick as a
flat, sewn-in resting platform 4" wide, and additional layers of soft foam are
sewn as arm rotation stoppers into the inside (thumb side) of the sling. Even more
foam is sewn around the wrist area since the heel of the hand needs special
treatment or it gets sore. The cloth needed to be slit for a couple inches where
the heel meets the wrist so the cloth edge didn't cause discomfort. Your wrist
may not be as fussy--try it and adjust as needed. Note the keyboard holder I'm using these days. |